Friday, March 7, 2014

What Walgreens has for Easter 2014

I went to have my passport photo taken at Walgreens today.  They pulled a white screen down from the beer wall (I'm still loving the fact you can buy alcohol everywhere down here!) in the middle/front of the store.  I wasn't prepared to have everyone standing in line stare at me while I was having my photo taken, but oh well.  While I was waiting for the photos to be developed, I ventured down the seasonal isle.  They had a ton of candy and little nicknacks for Easter.  I snapped a few pics to share with you guys.  Nothing too exciting, but I think some of these things could be turned into something cute for a child, roommate, or coworker. 

These bunny jars would be a cute little surprise on someone's desk in the morning?  Fill them with their favorite candy. Don't forget your teachers :).

(That is not dirt under my thumbnail.  It's an injury from an orange peel.  Hate it when that happens!)


I thought these little guys were cute too. They come in different positions. My favorite is the first one because it reminds me of my own little bunny!  You might be able to sit one of these in a potted plant if you plan on giving someone an Easter Lilly or something?


Here's another candy holder idea. He could double as Easter decor too, and fill him with decorated eggs. 


These are tiny little 99 cent baskets. I thought they were affordable enough for someone in college to leave their roommate a little Easter present if they wanted. 

Kinda cute right?  They hop of course. 


Little basket fillers. 


I really like these boxes. They had them for Christmas too. 


More basket fillers.  I love how the monkey walks on his hands. 

I was never a Hello Kitty fan, but there sure seems to be a lot of it out there!


Interesting combination?  If the kids eat a ton of candy, at least this is a good way to burn off their sugar high. 


Chocolate bunny with headband included. 


I'm sure there are a lot of kids that would get a kick out of this. 


This is a neat little box :). It's filled with chocolate Easter related animals and other things. 

And that's it!  Like I said, nothing too exciting, so when my photo was done, so was I.  I went to Marshalls next.  I love that store.  I'll post that adventure next :)
Wednesday, March 5, 2014

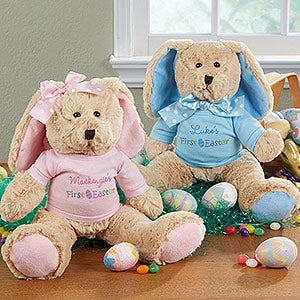
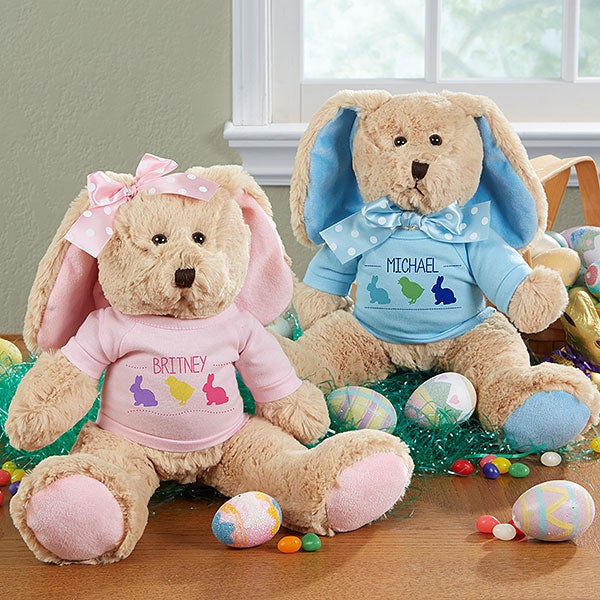
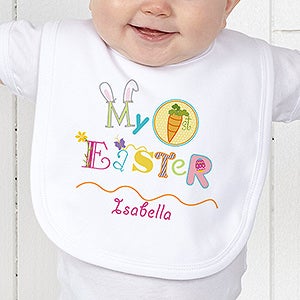
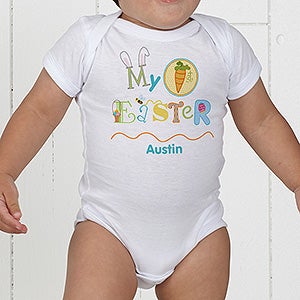
Baby's First Easter


Find here


Find here


Find here


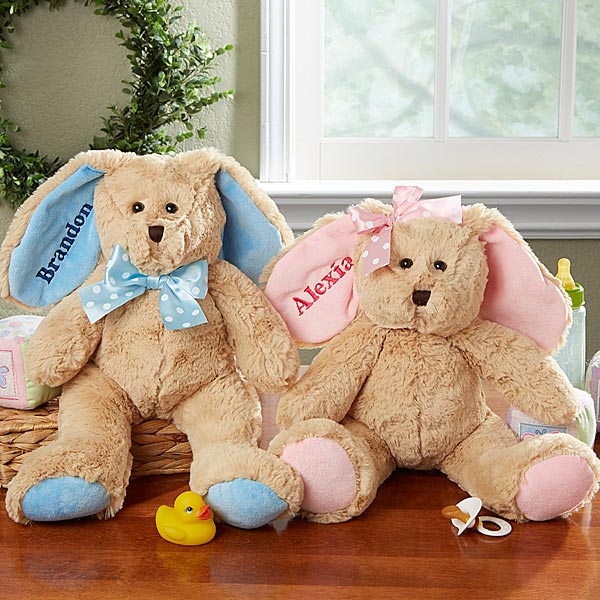
Don't these look so soft and cuddly?  To me, they look like teddy bears with long ears, but I still think they are super cute.  Here is another bunny choice:


Find here


I love these too..


Find here


Find here


Find here

For these and other Easter gifts, go to PersonalizationMall.com


Monday, February 24, 2014

Tooth Fairy Doors!

 I think the Tooth Fairy is under rated.  Sure, the idea of a fairy coming into your room at night to leave you a quarter (I hear tooth fairies are much more generous these days!) in exchange for your tooth is fun, but I just think there is soo much more fun to be had with this little lady.

I came up with a few ideas, and it seems I'm not the only one who thought the tooth fairy needed her own door!  I've seen fairy doors in the past, but when I came across these particular ones last week, I fell in love.  They even have little teeth on them :)


  Aren't these whimsical little doors perfect for your tooth fairy to gain access to your child's bedroom? 

They are handcrafted, and available from the eBay seller and store, Mystical Moon Creations, and I think their prices are extremely reasonable!

These doors here

 
These doors here


and here


I actually gathered a few things at the craft store to make my own (they don't even come close to how great these look), and I will show you that later in the week, but I just had to show you these first.

Do you have any special tooth fairy traditions??


Friday, February 21, 2014

Glitter Flower Pots


My boyfriend was smart this Valentine's Day, and bought be something I hopefully won't kill.  I have terrible luck with plants, and I feel so bad every time he gets me an orchid or something else, because it never lasts more than a month.  So, here we go again :)

I love this little cactus. It was perfect because he color coordinated my gift (uhh, super impressed by that?), and this was our first Valentine's Day in Texas.  He did forget one thing though... a pot lol.  He wrapped a paper towel around it, so that the dirt wouldn't get all over everything else.  That's ok though, because it gave me the perfect opportunity to get my glitter out again!  This was a very easy project, but I'll fill you in on how I made these pretty little pots anyway.  If you're wondering why the little pot is empty, you'll find out why next week ;). UPDATE:: Never mind, all I ended up growing for the little pot, was mold.  Womp, womp!

You will need:
Flower pot (got mine for 99 cents at the thrift store) The tiny pot came in a set of 3 from the Dollar Tree.
White paint
1 inch Sponge brush
Mod Podge or Glue
Glitter
Paper Plate or large sheet of paper

1. Start by making sure there isn't any sticky stuff left over from a price tag on the surface of the pot you are going to paint.  I learned this the hard way, so just trust me and take the extra minute to wash it off COMPLETELY.

2. To paint my pot, I held it from the inside, and rotated my brush around the sides.  You're going to need at least 3 coats.  The good thing is, the terracotta absorbs it quickly and you won't have to wait long to paint the next coat.  Make sure you paint the inside too; just down to the rim.  Clean and dry your brush.

3.  Once your everything is dry, apply the Mod Podge evenly to just the outside rim of the pot.  Make sure you don't miss any spots!

4.  Over a paper plate, immediately pick it up from the bottom and tap out your glitter directly onto the rim, while rotating your pot.  You could also roll the pot into the glitter, but I found this method works the best. Tip: Run your finger around the bottom edge of the rim while it's still wet. This will remove any stray/uneven glitter.  When you're done, you can make a funnel with your plate, and pour it back into the container.

5. Once dry, sponge another coat of mod podge over top of the glitter.  This will seal the glitter, and prevent any from flaking off and making a mess on your desk or window sill.

That's it!  If you make this little project, I'd love to see it!  Tweet me your pics at @thepaperpinata

Have a good weekend!
<3 Ashley
Thursday, February 13, 2014

How To Fix What Your Boyfrie-err Dryer Shrunk


There are two reasons why I am writing this post tonight.

1- Because I am super excited about this discovery and
2- Because one of my favorite gifts ever has led me to it!

Thanks to something my boyfriend got me for my last birthday, I've discovered a solution to
 "Honey, I Shrunk Your Pants......uhhh, again"

There's nothing more frustrating than putting on a freshly washed pair of pants, only to realize the hem is now above your ankles because someone threw them in the dryer.  Especially because once they're dry, there's nothing you can do about it, right??  You just have to throw them back in the wash, and start over?

 Wrong!


 So anyone who knows me, knows that I can't stand wrinkled clothing, and until my last birthday I ironed EVERYTHING.  Jeans, sweatpants, curtains, pillow cases.... everything.  Half the reason I'd be late to school or work was because I had to iron everything before I left the house, and when you change your outfit 10 times before you leave, that's a lot of ironing!  And as much as I hate wrinkles, I hated ironing even more.  So, last May my boyfriend got me the best gift ever.  A lot of people were like, "Are you serious? He got you what?!"  Haha, some people just didn't get it, but I was beyond excited!


 Any guesses on what it was??


That's right.  A steamer.

And today I found that this amazing little machine doubles as a shrinkage reverser.  I couldn't take pictures of how I did it, because it takes 2 hands, but it's really easy to get results like you see here....


And it's as simple as this:

At the same time you're steaming out those horrible devil wrinkles, pull straight down on the legs.  Umm, that's it! It's amazing.  If you need a lot of length, steam one leg at a time, pull them off the steamer, step on the ends, and pull up (like you would when you pull them out of the washer).  This worked really well on my cardigans too.  Just steam at the armpit, and pull at the wrist as you drag the steamer down the sleeve.  They stretch like bubblegum, and you get instant inches!  No more acting like your tops are meant to be quarter length (and no more wrinkles!).

If you're interested in a steamer, this is the one I have.  I absolutely love it, and it fits in my closet.  It heats up way faster than the iron, and there's no annoying ironing board to mess with.

Happy Valentine's Day Eve!

Tuesday, February 11, 2014

Air Mail!

I found this template from MarthaStewart.com.  I thought it was really cute, so I made one up real quick to show you guys.  I will probably send one back home in PA :) 
(Not sure if you can tell, but this photo is edited a little because it's sooo dark and gloomy here today, and I'm not feeling well enough to play with my camera settings...boo thyroid problems!)
What you will need:
Red/Pink and White card stock
String
Double sided tape, glue, or glue stick
Heart whole punch (optional)
Paint Pen (optional)
Printer (optional)
Envelope
The instructions are actually on the template, which is great.  The only thing I did differently (because I didn't feel like cutting out the heart clouds) was use my heart punch.  My handwriting is awful when I try too hard, so I printed the words off my computer.  I used my paint pen to make polka dots on my airplane, but that's totally optional too ;).  The instructions say to leave a "tail" at the end of your hearts, and tape it to the inside of your envelope.  I think that should help everything come out in order when your recipient pulls out the airplane.  What I didn't show you (because it didn't show up well in the other photos) was I wrote "made with love" on the reverse side of the hearts.   I think it turned out super cute.  I love me some Martha Stewart!
Monday, February 10, 2014

Message in a Bottle


I really like this gift idea for couples who got married on the beach, or just have an upcoming tropical vacation they're looking forward too.  
  

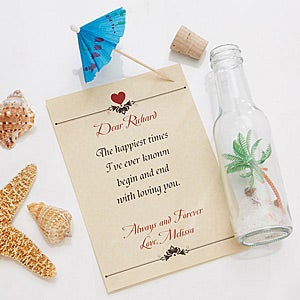
This message in a bottle from Personalization Mall is 6 1/2 inches tall. It comes with sand, seashells, a tiny umbrella, a small palm tree, and a personalized message to your loved one. 

The key to this gift, is to get it to your husband/wife/bf/gf while they're at work or someplace else.  I will list a few examples below of what other people have said in their messages, but if it were me, I'd write something (or put something in it) that makes him look forward to later.  Maybe reference the other bottle that's waiting for him at home too :)...after all, it will be Friday!  
  
 http://click.linksynergy.com/fs-bin/click?id=4NPIF6m7eU8&subid=&offerid=300910.1&type=10&tmpid=2398&RD_PARM1=http%3A%2F%2Fwww.personalizationmall.com%2FLove-Letter-In-A-Bottle-Romantic-Personalized-Gifts-i29458.item%3Fproductid%3D10230%2526sdest%3Dstore-st%2526sdestid%3D16 

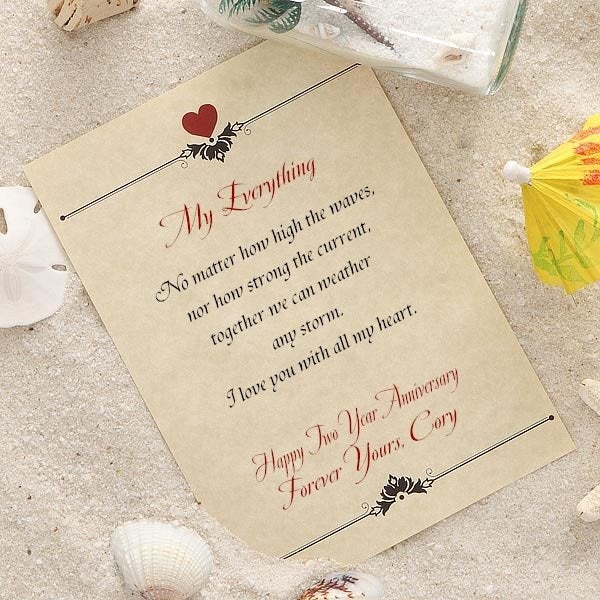
I just liked how it talks about waves and currents. 

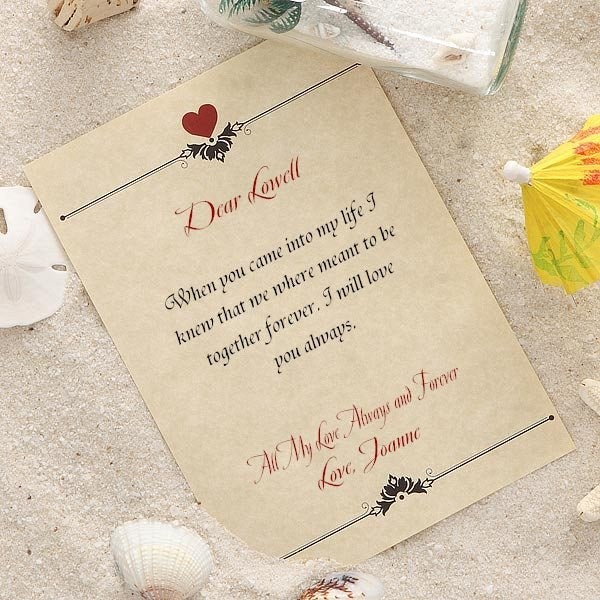
Here's one I thought was sweet:


Sometimes it's hard to find a gift for your boyfriend or hubby on Valentine's day.  It's not like you want to send them flowers or buy them a big stuffed animal.  If you could find a way to send this to their work though... that might be fun :).  The best part is, it's only $15. 

FYI, Personalization Mall is still guaranteeing delivery by Feb 14th without any rush fees!  I am obsessed with this place :)  Click here to check them out.